This tutorial on How to Make Homemade Christmas Stockings is an easy DIY project perfect for beginners. Sew these small personalized Christmas stockings for your family or use them as a special holiday gift for grandma!
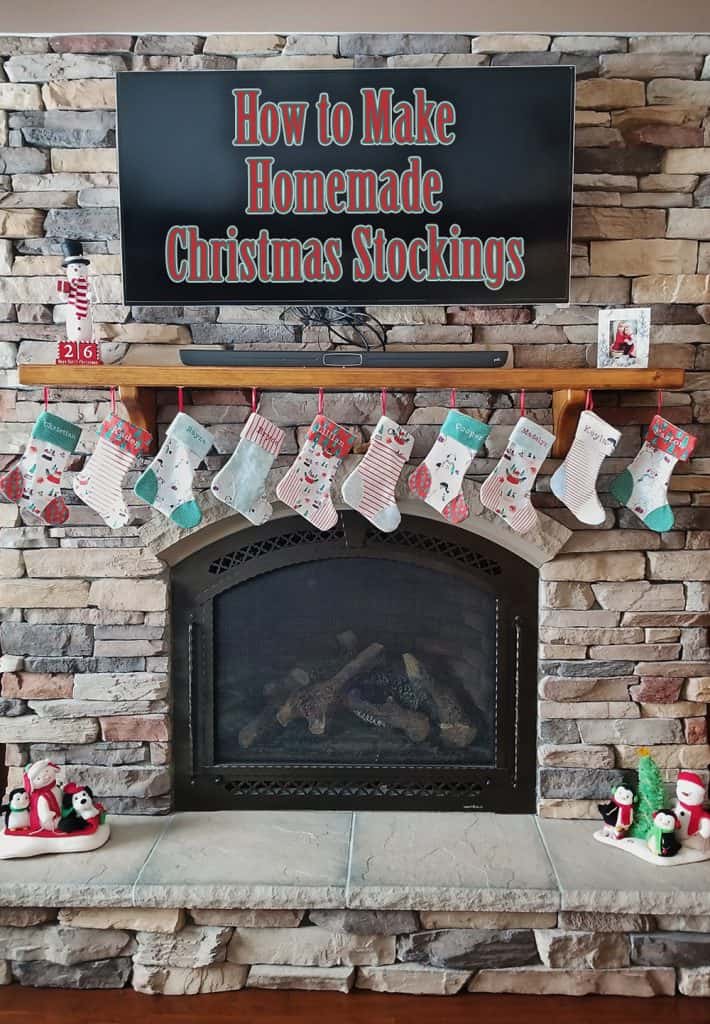
How to Make Homemade Christmas Stockings
I was trying to think of a perfect Christmas gift for my very hard to buy for Mother. She has everything she needs and has very few hobbies, so it is always a challenge to find the perfect gift for her. What she does have, is a LOT of grandchildren. Ten to be exact. A light bulb went off and I decided I would go the DIY gift route, like last year’s DIY Wine of the Month Gift Basket Idea.
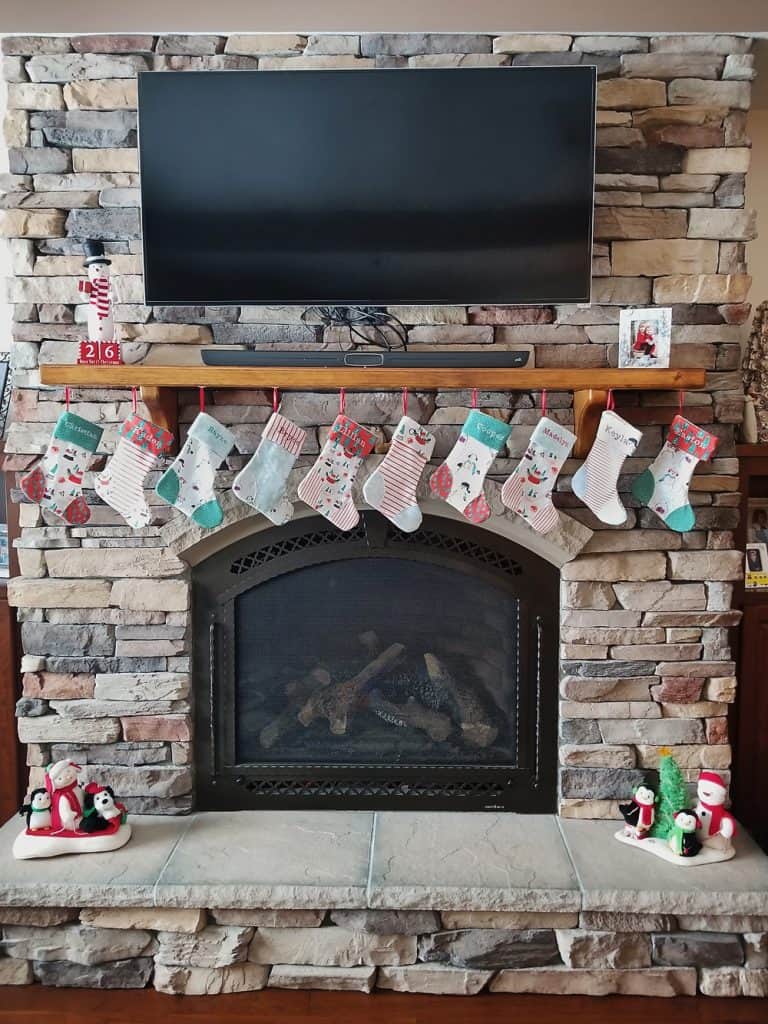
I ended up sewing her personalized stockings for each grandchild using the method below on How to Make Homemade Christmas Stockings. It was a much more special and affordable gift than buying personalized stockings. There are lots of adorable designs to choose from online, but they tend to be very expensive.
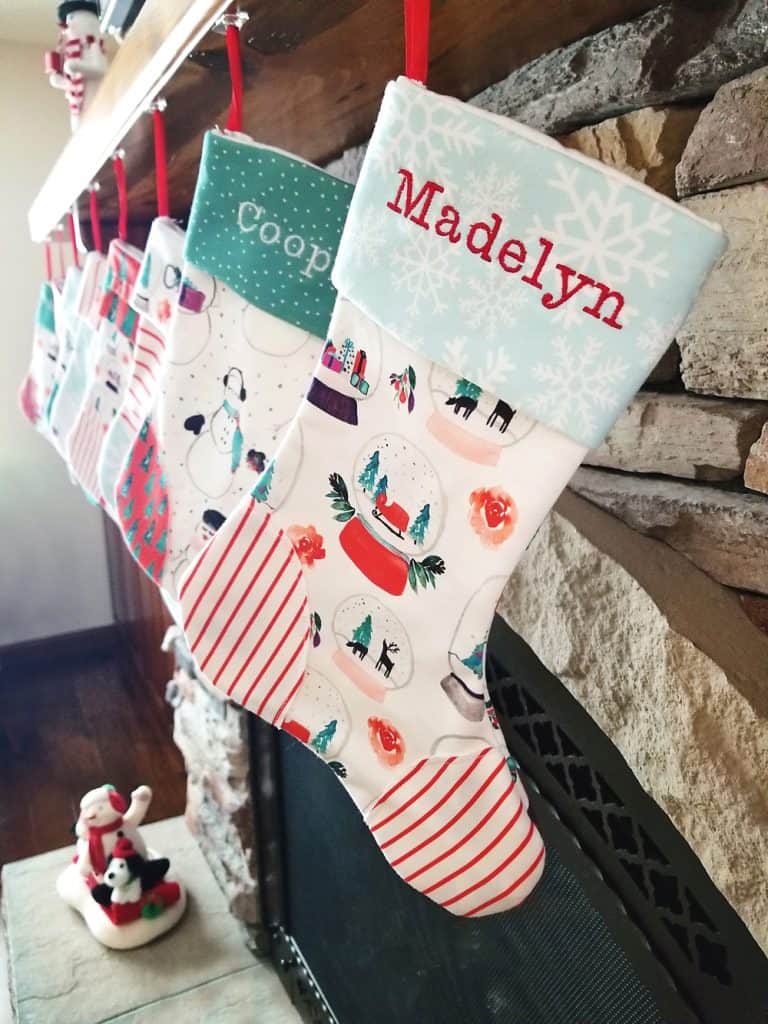
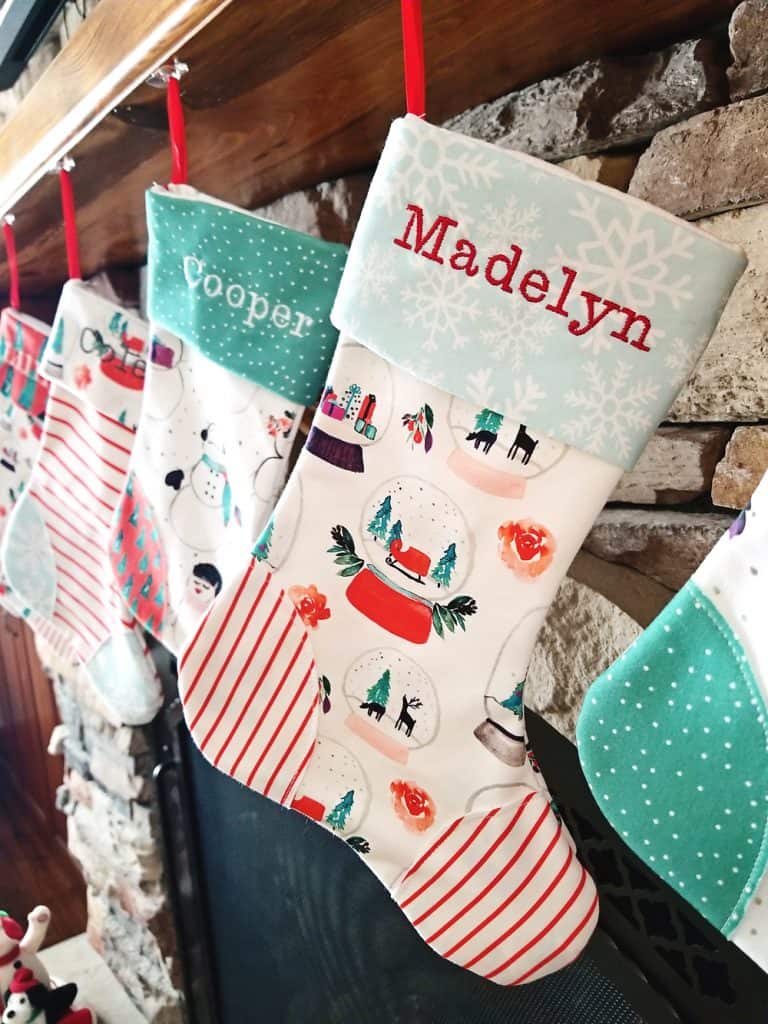
I chose fabrics from the Winter Berry collection by Indy Bloom.You can make all your stockings the same or choose lots of fabrics to mix and match like I did. I opted for the heavier duty interlock knit fabric and am so glad I did. It is a softer and more luxurious fabric that hangs very nicely with the homemade stockings, but is also more expensive. You can certainly use any quilting fabric that you find at your local quilt shop.
Because I was using so many fabrics with various colors and designs, I actually pre-designed each stocking in Photoshop. This way, no two fabrics would end up being next to each other too often, or used too much. While this isn’t realistic for most people, I do highly recommend laying out your fabric pieces together before sewing everything to make sure they all look good together. If you are making all the stockings the same, that really simplifies things!
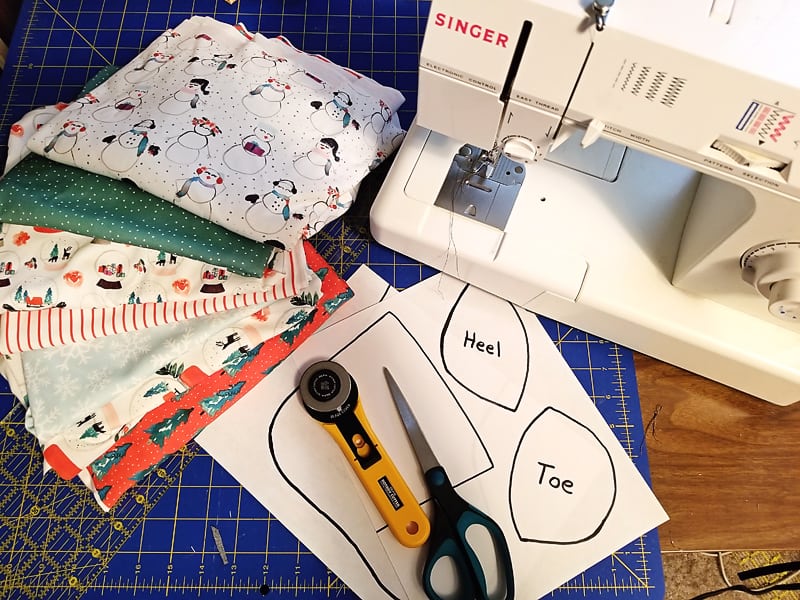
What you need to make homemade Christmas stockings:
- FREE Christmas stocking pattern
- 1/3 yard (44″) fabric for every 2 stockings (I used Winter Berry fabrics)
- 1/4 yard (44″) coordinating fabric for toe patch and cuff
- 1/3 yard solid lining fabric (I used Kona Snow)
- rotary cutter & cutting mat -OR- fabric transfer pen
- coordinating thread
- ribbon
- sewing machine
- cardboard from a box
- scissors
- pins
OPTIONAL (for personalized stockings)
- embroidery machine
- embroidery stabilizer
- coordinating embroidery thread
- -OR- fabric paint -OR- iron-on letters and iron
How to make homemade Christmas Stockings
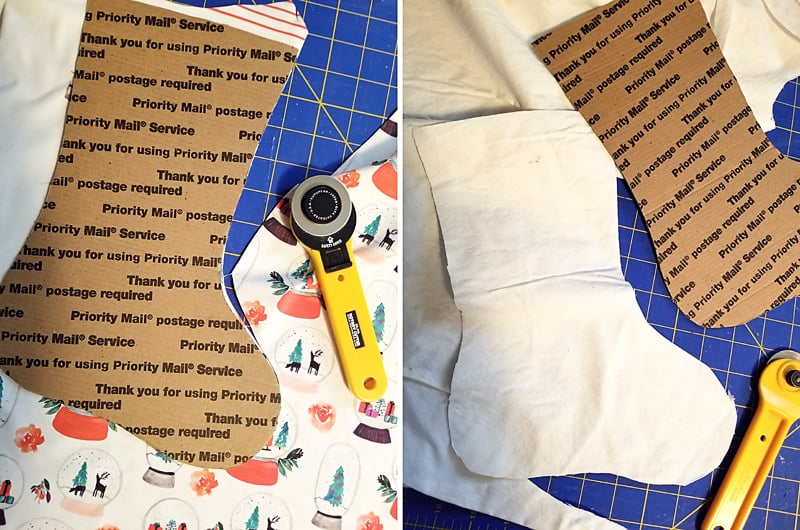
To get started print out this FREE pattern for Christmas Stockings. You can use this pattern to cut out your fabric one of two ways. The first option is to trace the pattern onto cardboard and use that as a pattern with your rotary cutter. The second option is to use fabric pens that dissolve with water, to trace the patterns onto the fabric and cut them out using a scissors.
Using your method of choice, cut out the following pieces:
- 1 front stocking, from main fabric
- 1 back stocking with pattern piece turned upside down, from main fabric
- 2 stockings, from lining fabric
- 1 toe piece, from coordinating fabric
- 1 heel piece, from coordinating fabric
- 7″x12″ rectangle, from coordinating fabric (for cuff)
- 7″ piece of ribbon
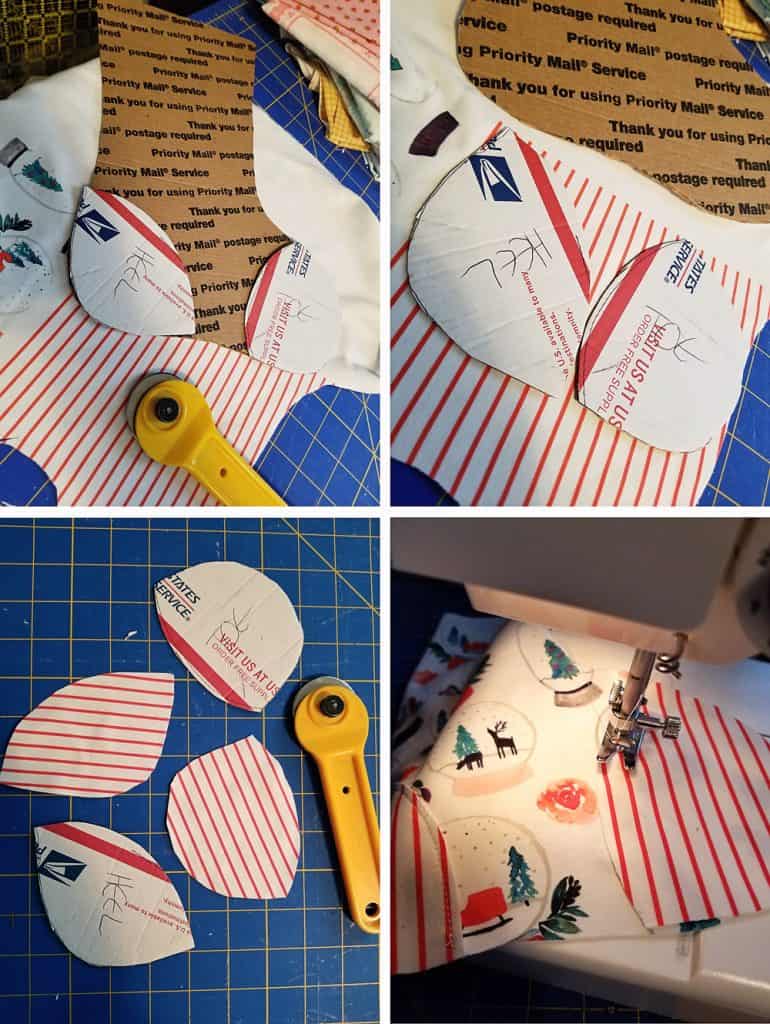
NOTE- When you are cutting out your toe pieces, if you are using a pattern like the stripes below be careful about lining them up. I placed the heel and toe patterns over the main stocking pattern and carefully set the heel and toe patterns on the fabric so the stripes would line up together. If you are using a random print, this isn’t a necessary step.
Sewing Homemade Christmas Stockings
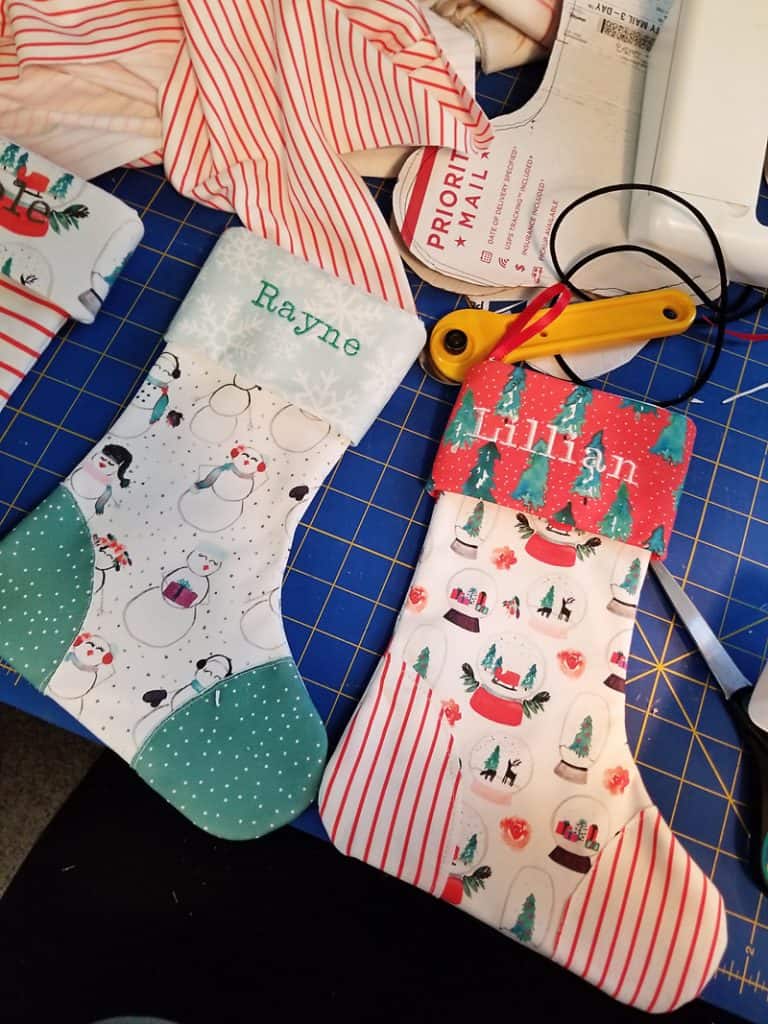
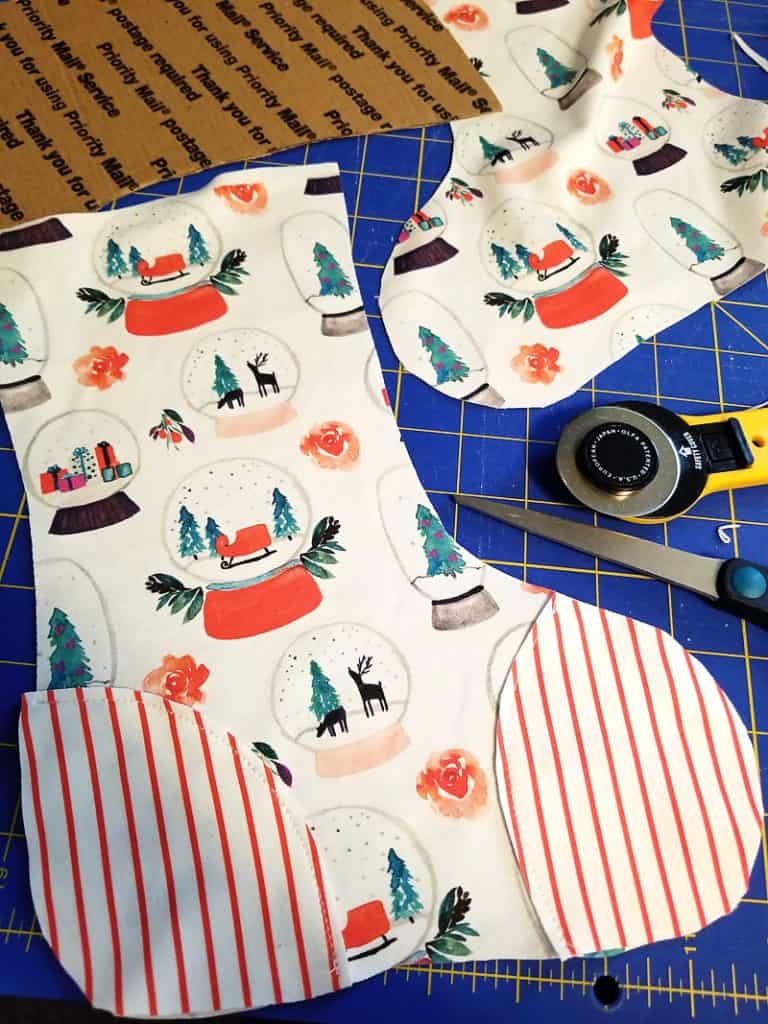
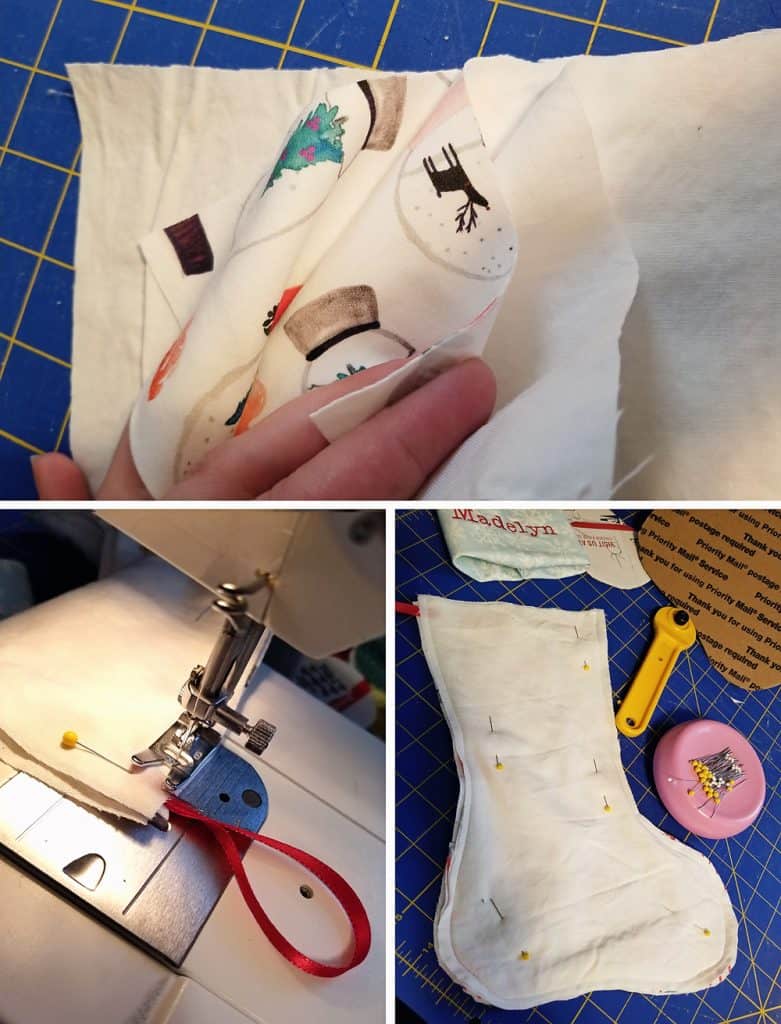
Sew the heel and toe pieces to the front stocking piece. You only need to sew the one edge towards the middle of the stocking. The outside parts will be sewed together when everything is assembled. I left the patches with raw edges, not only because it would be far easier to sew, but also because patches are rough by design so it was fitting. (see picture below)
Personalizing your Homemade Christmas Stockings
Once your front stocking piece is assembled with the patches and your back stocking is cut out, it is time to make the cuff. This is where you can choose to personalize your stockings with family names. While this isn’t a necessary step, it certainly adds a special touch to these Christmas stockings.
I own the Brother LB-6800 Embroidery Machine, so I was able to embroidery them on my own. If you or a friend don’t own an embroidery machine, there are simpler methods that can achieve a personalized look as well. Puffy paints, as they were called in the 90’s, or now better know as fabric paint, are a great option as well as iron-on letters. Whichever method you choose, I highly recommend personalizing the cuffs before sewing them on in case you make a mistake with the lettering.
Embroidering your Homemade Christmas Stockings
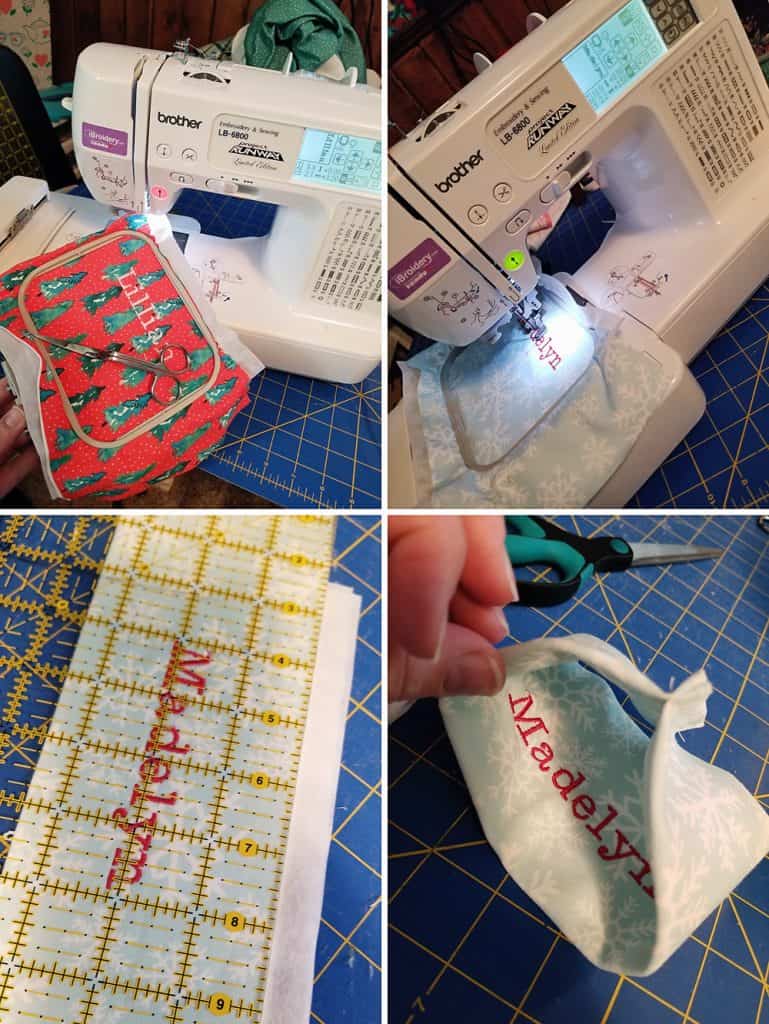
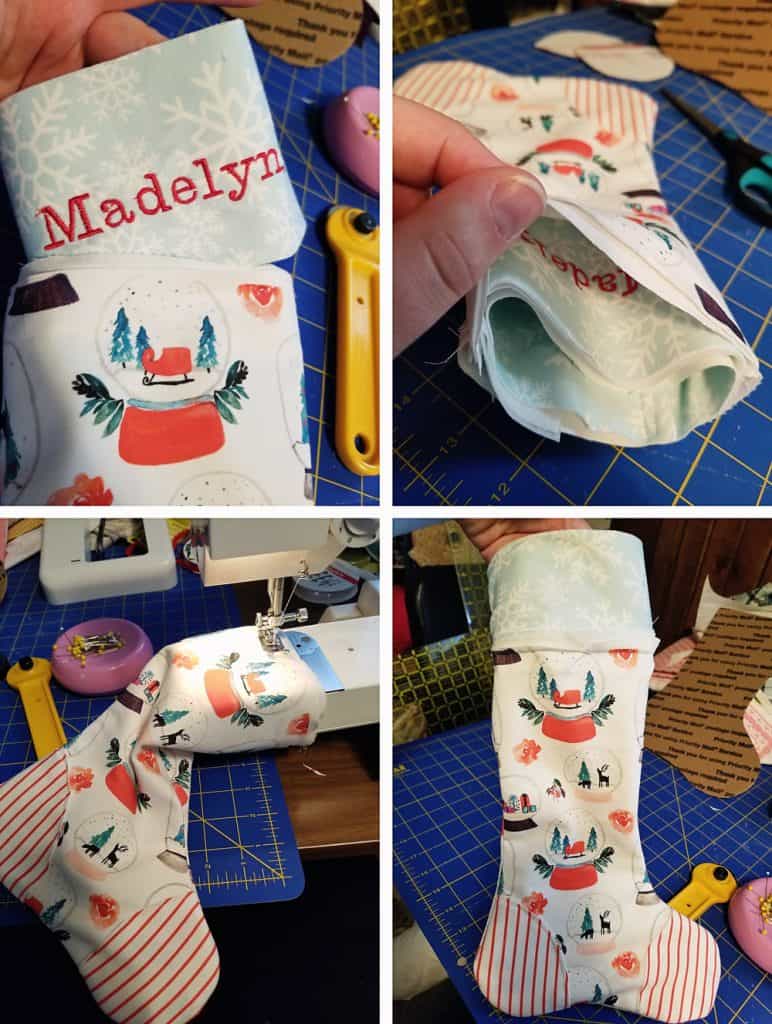
Press your 7″x12″ piece of fabric the long way so there is a visible press mark and then lay it over a piece of fabric stabilizer. Lock the top center portion of the fabric tightly into the embroidery hoop. You need to center the name between the top edge of the fabric and the center press mark. (see photo above) Choose your font in the machine and thread color that will coordinate best with your fabrics and embroidery the name on the fabric.
When the embroidery is complete, remove the fabric and stabilizer from the hoop. Trim any excess stabilizer that shows on the sides of the fabric. Fold the fabric, wrong sides together, so you have a folded 3.5″x12″ cuff with the raw edge on top.
Fold the fabric again width wise with the name folded on the inside. Sew the raw edges together with a 1/3″ seam. Fold the cuff out with the name on the outside and seam on the inside.
Assembling your Personalized Christmas Stockings
Begin assembling your stockings by laying one of the lining pieces on your cutting mat. Top it with the front piece of your stocking with patches facing up, followed by the back of your stocking facing down (right sides together). Place the second lining piece on top and pin together. On the top left corner of the stocking, pin the 7 inch ribbon, folded in half, 1/2 inch under the top lining piece with the loop facing out. (see photo above)
Sew this stack of layered pieces together with 1/3″ seam, from the top right corner to the top left corner, leaving the top of the stocking open. Turn the stocking right side out and pin the ribbon down into the stocking so it doesn’t get sewed over with the cuff attachment.
To attach the personalized cuff to the Christmas stocking, tuck the cuff, with the name facing front center, into the stocking, lining up all of the raw edges. Using your sleeve arm on your sewing machine and starting from the back center, sew the cuff onto the stocking. I like to start in the back center, so if there is some rippling in the fabric it will end up in the back. Also, it’s not a huge deal if there is some rippling because it will be folded out.
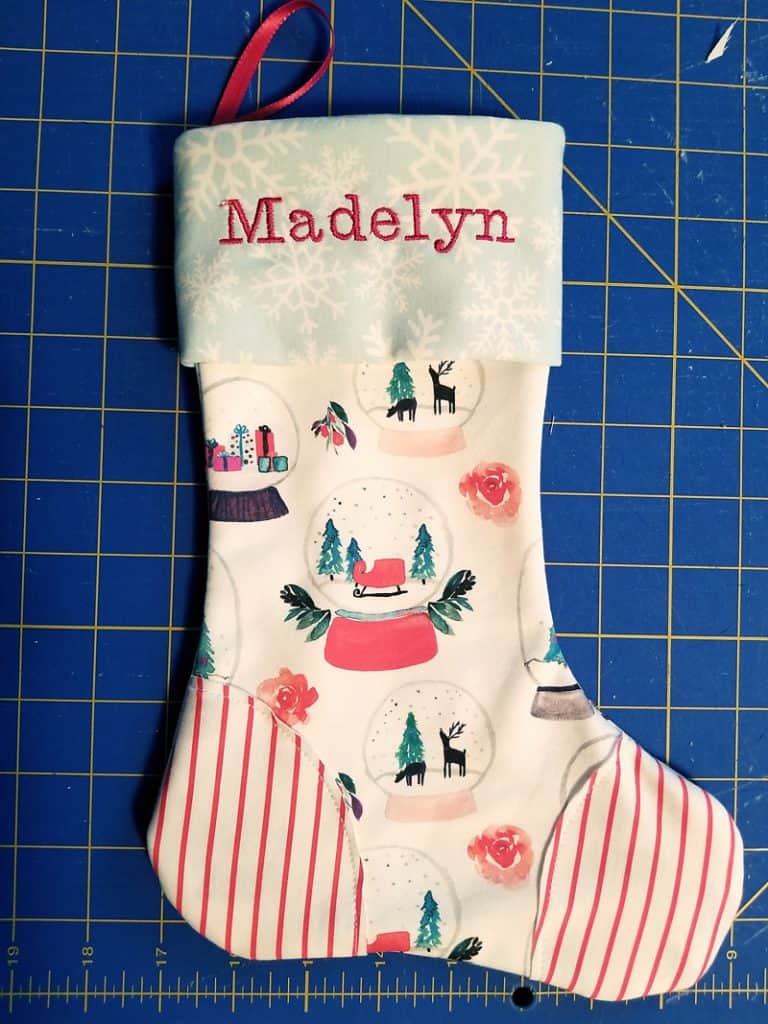
Turn the cuff to the outside and unpin the ribbon. Your stocking is ready to stuff with goodies for your loved ones!
The finished product is around 8″x12″. They are a small stocking perfect for a large family or a small space. There is still plenty of room to tuck some treats in to the stocking from Santa, but they aren’t overwhelmingly large so you can’t fit the entire family across your mantel.
Hanging your homemade Christmas Stockings
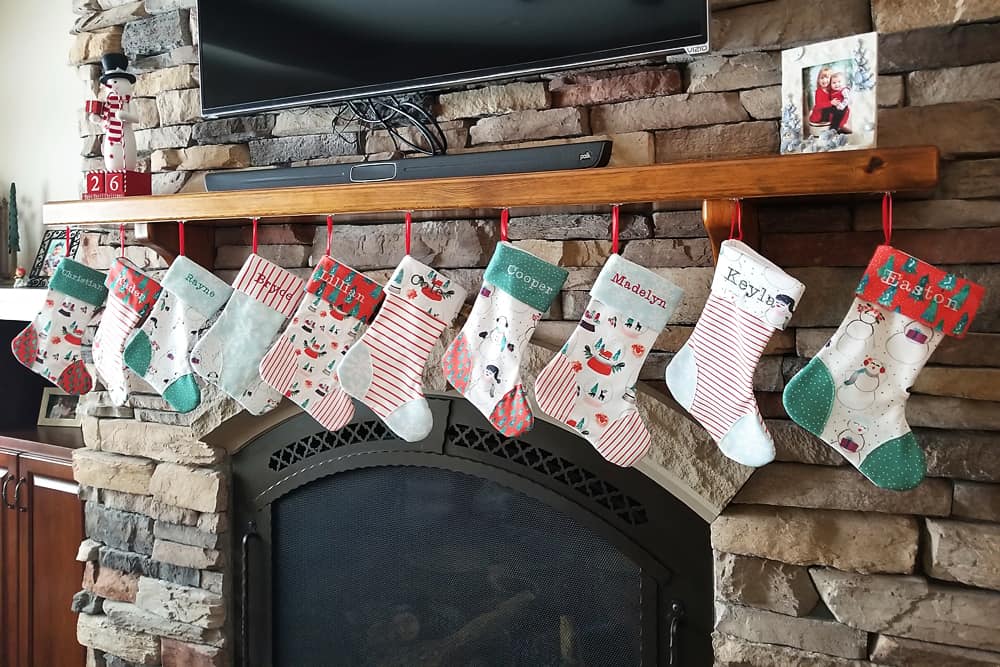
When hanging stockings, I use Mantle Clips in my own home, but my parent’s mantel was too thick for that. They actually had their mantel custom made by the Graceville Cabinet Company, from a beam in an old grain elevator on our farm. This was a special touch in their new house they built in town when moving off the farm to take a little piece with them.
We searched out other stocking holders, but everything was too dramatic for so many stockings across one mantel. We actually ended up using Command Hooks on the underside of the mantel to hang all the stockings. When using Command Hooks, be sure to test one out in a discrete area to be sure they won’t ruin the finish of the wood or wall!
The best part about making your own homemade Christmas Stockings, is that if more people are added to the family, you can add more matching stockings! I am keeping the extra pieces of fabric stored away in case our family happens to add any more grandchildren. Instead of worrying about a store discontinuing a design, you can keep making them as your family grows!




Valerie says
I loved making these! My only adjustment was to make the ribbon a bit longer (10 inches).
Danielle Green says
So happy these worked for you!
Coleen Koehl says
So cute and your directions are amazing! I’m going to have to attempt these!
Julie Evink says
WOW! These are simply amazing. Maybe my daughters will grow up and make me these 🙂
Melissa Howell says
Those are so stinkin’ adorable! My girls would all love to have a stocking like that!
Malinda Linnebur says
These are SO CUTE!! I have wanted to make stockings for my family and your tutorial looks so easy! Thanks for sharing!
Toni | Boulder Locavore says
This is really adorable! I love it!
Lisa Grant says
These are a nice keepsake! The fabrics are adorable!!
Kathryn says
Looks very cute! I would love to do something like this for my kiddos. It’s something that would come from my heart and I know they would cherish.